May 27, 2026 · 12 min read
Passport & Visa Photo Background Removal: Free AI Guide (2026)
Turn any selfie into a compliant passport or visa photo with a pure white background — free, no signup, no watermark. Step-by-step 2026 guide.
A passport renewal, a Schengen visa application, a new driver’s license, an OCI card, a green card photo — at some point in 2026, almost everyone needs an ID photo with a pure white background and very specific dimensions. The official guidance from the U.S. State Department, the UK Home Office, the European Commission, and most other issuing authorities is identical: a recent color photograph, taken against a plain white or off-white background, showing the full face from chin to crown, with no shadows and no other people in the frame. The cheap way to get one is to walk into a pharmacy or a photo shop and pay USD 15–20 for two prints. The fast, free, modern way is to take a selfie at home and run it through a free AI background remover in your browser. This guide shows you exactly how, what every major country accepts, and how to avoid the three mistakes that get applications rejected.
Why almost everyone now takes their own ID photo
The 2026 generation of phone cameras shoots at a higher resolution and with better dynamic range than the dedicated USD 800 photo-booth cameras still sitting in most pharmacies. The only thing the pharmacy is really selling you is the white background, the correct print size, and the assurance that the photo will be accepted. All three of those things are now solvable at home in about three minutes, for free, without a subscription. A free in-browser AI tool removes the cluttered home background, replaces it with the regulation-compliant pure white, and exports the result at exactly the pixel dimensions every government portal expects.
The savings add up. A family of four renewing passports together would pay roughly USD 80 at a pharmacy for prints, plus another USD 20 in gas and time. At home, the same job costs nothing and takes less than fifteen minutes. For people in rural areas without a nearby photo shop, or for anyone applying for a visa from abroad, the DIY route is not just cheaper — it is often the only practical option.

What each country actually requires in 2026
Every issuing authority publishes the exact specs on its official website. The rules vary slightly but converge on a handful of constants. Here are the most common ones in 2026.
- United States passport & visa: 2×2 inches (51×51 mm), color, taken within the last six months, plain white or off-white background, head between 1 inch and 1/8 inches (25–35 mm) from chin to crown. See the U.S. State Department photo requirements.
- UK passport: 45×35 mm, color, plain light-gray or cream background (not pure white), head 29–34 mm from chin to crown, no shadows.
- Schengen visa (EU): 35×45 mm, color, neutral white or light-gray background, head 32–36 mm from chin to crown, neutral facial expression, mouth closed.
- Canada passport: 50×70 mm, color, plain white background, head 31–36 mm from chin to crown, taken within the last six months.
- India / OCI card: 2×2 inches, color, plain white background, full face from front, both ears visible.
- Australia passport: 35–40 mm wide and 45–50 mm tall, color, plain light background, taken within the last six months.
- China visa: 33×48 mm, color, pure white background, head 15–22 mm wide, no glasses since 2016.
Notice the pattern: every country wants a plain, light, even background. AI background removal followed by a solid white (or light-gray, depending on the country) replacement layer is the fastest path to compliance. Always cross-check the latest spec on the official government site before you submit — rules change, and rejection costs you weeks.
The step-by-step recipe (selfie to compliant ID photo)
The whole workflow takes under three minutes once you know it. Here is the exact sequence.
Step 1: Take the source photo correctly
Stand 1.5–2 meters from a plain wall (any color), facing a large window for soft, even daylight. Avoid overhead lighting that casts shadows under your eyes and nose. Use a friend, a tripod, or a propped phone with a 10-second timer — not a mirror selfie. Look straight at the camera, neutral expression, mouth closed, eyes open and clearly visible. Wear ordinary clothing (no uniform, no head covering except for religious reasons that the issuing authority accepts). Shoot at the highest resolution your phone supports, in standard 4:3 aspect ratio, not portrait mode (the artificial background blur often confuses AI segmentation and gets flagged by some automated screening systems).
Step 2: Crop loosely around your head and shoulders
Before background removal, do a rough crop in your phone’s built-in photo editor so the frame contains just your head, shoulders, and a bit of margin. Removing the background of a tightly framed photo is faster, more accurate, and produces a smaller output file.
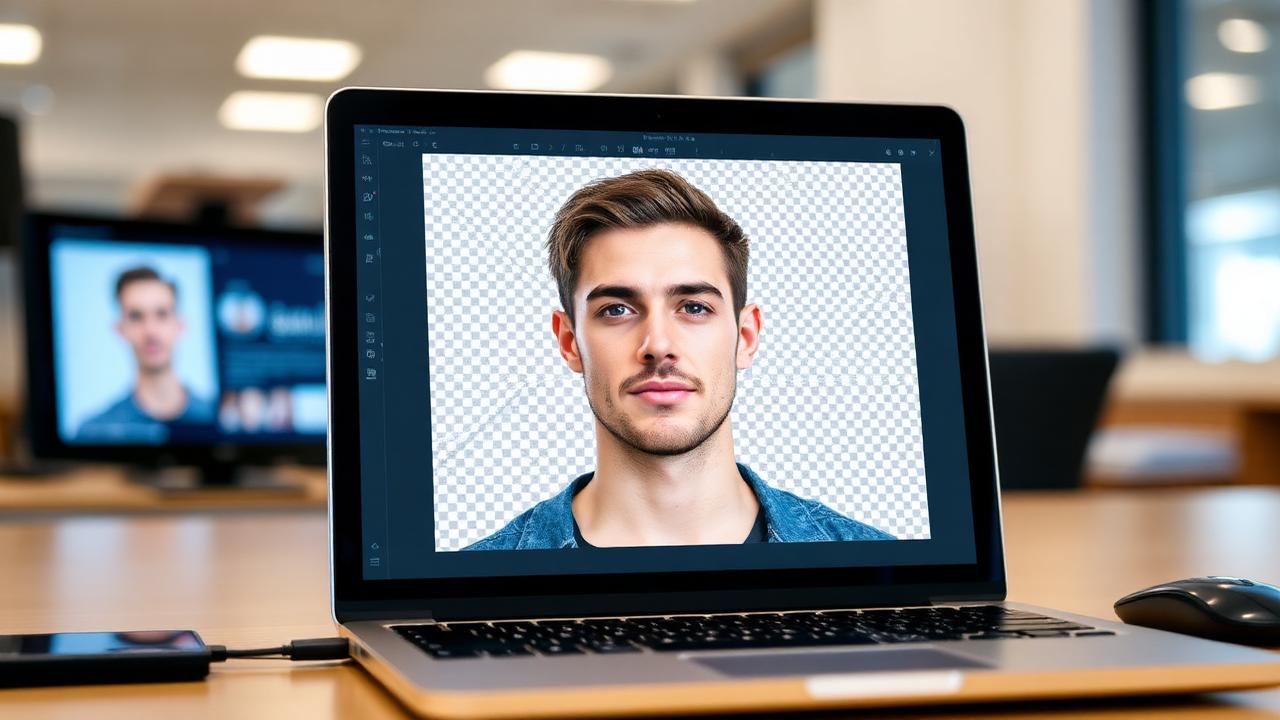
Step 3: Run it through a free AI background remover
Open MagicBG in any modern browser (Chrome, Edge, Safari, Firefox, Arc). Drag the cropped photo onto the drop zone. The first visit downloads a small AI model (about 80 MB); after that, every subsequent photo processes in two to five seconds. The model runs locally on your device through WebGPU — your face never leaves your laptop, which matters when you are submitting government documents. Click Download PNG to save the transparent cutout.
Step 4: Add the regulation white background
Open the transparent PNG in a free image editor like Photopea (web-based, no signup) or GIMP. Create a new layer beneath your portrait, fill it with pure white (hex #FFFFFF) for U.S. and most other countries, or light gray (hex #F2F2F2) for UK passports. Flatten and export as a high-quality JPG.
Step 5: Resize to the exact regulation dimensions
Use the official online photo tool for your country (the U.S. State Department’s photo cropping tool is the most generous), or any free passport-photo template tool. Drag the chin-to-crown guides over your face and let the tool crop and resize. Save the final JPG at 300 DPI for printing or at the exact pixel dimensions the government portal demands for digital upload.
The three mistakes that get passport photos rejected
Government photo-screening software is strict and unforgiving. These are the three errors that account for the vast majority of rejections, all of which AI-cutout DIY photos are vulnerable to if you are not careful.
1. A shadow on the background
Even when the AI replaces the background with pure white, a faint shadow can transfer if the original photo had strong directional lighting. The fix: shoot against the wall but with your body at least 60 cm away from it, so the shadow falls on the floor instead of the wall behind your head. After background removal, the resulting cutout has zero shadow attached to it; the white layer underneath is mathematically clean.
2. Lost hair detail or jagged head outline
The number-one rejection reason for AI-cut passport photos in 2023 was poor hair-edge handling. The 2026 generation of segmentation models has essentially solved this; modern models hold fine hair, frizz, and wispy strands cleanly. But if your source photo is low resolution or your hair color is very close to the background color, you may still get jaggies. Run through our short guide on fixing jagged edges after background removal for a 60-second cleanup pass.
3. Wrong head proportions
This has nothing to do with background removal and everything to do with cropping. Every country specifies a chin-to-crown measurement (typically 25–35 mm out of a roughly 50 mm tall photo). If your head fills too much or too little of the frame, the application is rejected automatically. Use the official cropping tool or a passport-photo template — do not eyeball it.
Printing vs digital upload
Most 2026 passport and visa applications can be submitted entirely online with a digital photo upload (typically 600×600 to 1200×1200 pixels, under 240 KB as JPG). For these, export your final image at the exact pixel dimensions the portal lists and skip the printer entirely.
For applications that still require a printed photo (some in-person renewals, some embassy visa interviews, most U.S. driver’s license renewals at the DMV), export at 300 DPI and print on photo paper at any pharmacy with a digital print kiosk (Walgreens, CVS, Walmart) for USD 0.30–0.50 per 4×6 sheet that holds four 2×2 photos. That is a roughly 90% discount versus a USD 15 photo-booth print, for an indistinguishable result.
Why a local in-browser tool matters for ID photos
Your face attached to your passport number is biometric data. Uploading it to a random third-party background remover means handing a high-resolution copy to a SaaS provider that may store it, log it, train models on it, or have it indexed by their analytics. For most marketing images this risk is theoretical. For a passport photo, it is real and serious.
A local in-browser tool like MagicBG runs the segmentation model entirely on your own device. The bytes of your face never leave the browser tab. There is no upload, no server-side processing, no log entry on someone else’s machine, no risk of a future data breach exposing your biometric to identity thieves. For a document that becomes the foundation of every other ID you hold for the next ten years, this is the only acceptable workflow.
Free local AI vs paid online passport-photo services
A handful of paid services (Persofoto, ID Photo 4 You, Passport Photo Online) charge USD 5–10 per photo to do exactly the steps above on their servers. They are convenient but they upload your face, they charge per attempt, and their AI quality in 2026 is essentially identical to what you get from a free local tool. For people without a computer, a phone-only service can be worth the cost. For everyone else, the free local workflow is faster, cheaper, and more private.
The pharmacy walk-in option (Walgreens, CVS, Boots, FedEx Office) still exists and still works. It costs USD 15–20 and takes thirty minutes including the drive. Use it if you are in a hurry and the wall behind your home desk is impossible to shoot against. Otherwise, the DIY route delivers an identical compliant photo in a fraction of the time and at zero cost.
The same workflow works for every kind of ID photo
Once you have the recipe down, the same five-minute process produces compliant images for any document that requires a plain background portrait: corporate badge photos, university ID cards, professional certification photos (PMP, AWS, Cisco), national exam ID submissions, online dating profile portraits, LinkedIn headshots, and even concealed-carry permit photos in the U.S. For a dedicated walk-through of the LinkedIn variant — same idea, looser constraints — see our guide on LinkedIn headshot background removal.
Frequently asked questions
Is a DIY passport photo really accepted?
Yes. Every major issuing authority explicitly allows photos taken at home, as long as the final image meets the dimensional and background specifications. The U.S. State Department, UK Home Office, and EU all publish DIY guidelines on their official sites.
Do I need a special camera?
No. Any phone made in the last five years takes a photo at higher resolution than passport offices require. The key is lighting, not equipment. Soft natural daylight from a large window beats any expensive flash setup.
Can I wear my glasses?
For U.S. passports since 2016, no — glasses are not allowed except for verified medical reasons with a doctor’s note. UK passports allow glasses if there is no glare and the eyes are clearly visible. China visas explicitly prohibit glasses. Always check your country’s current rule before shooting.
Will the AI distort my face or make me look different?
No. A modern segmentation model only changes the pixels outside the body silhouette. The face, hair, and clothing inside the cutout are pixel-perfect copies of the source photo. There is no retouching, no skin smoothing, and no facial reshaping. The output is exactly what an issuing authority wants — your real face, on a clean background.
What if my photo gets rejected anyway?
The two most common rejection reasons are wrong head proportions (use an official cropping tool) and a shadow on the background (re-shoot with the body further from the wall). The AI cutout itself is rarely the cause; if it is, re-run with a higher-resolution source photo.
Bottom line
A compliant passport or visa photo is no longer a USD 20 trip to the pharmacy. In 2026 it is a three-minute DIY job using a free AI background remover that runs locally in your browser. Take a clean front-facing selfie, drop it into MagicBG, add a white background layer, crop to your country’s exact dimensions, and submit. The result is faster, cheaper, more private, and indistinguishable from a photo-booth print. While you are at it, the same workflow handles every other kind of ID photo you will ever need — from professional headshots to team photos in pitch decks.