June 11, 2026 · 12 min read
How to Remove a Background in Illustrator (Fast Way, 2026)
Remove a background in Adobe Illustrator using clipping masks, Image Trace, and the Pen tool — plus the 5-second AI shortcut that skips the tracing entirely.
If you searched "how to remove background in Illustrator," you've probably already discovered the frustrating truth: Adobe Illustrator has no one-click background remover the way Photoshop's "Remove Background" button or a dedicated AI tool does. Illustrator is a vector program — it's built to draw shapes with math, not to erase pixels from a photograph. That doesn't mean it can't be done. It means you have to pick the right technique for the kind of artwork you're working with. This guide covers all four legitimate methods, when to use each, and the AI shortcut that saves you ten minutes of pen-tool tracing.

The fastest answer (do this first)
For 90% of real-world cases — a product photo, a portrait, a logo on a screenshot — the quickest path is to remove the background before the image ever reaches Illustrator. Drop your image into a free AI background remover, download the transparent PNG, then File → Place it into your Illustrator document. You skip the Pen tool entirely and get a clean cutout in about five seconds.
- Step 1. Open the MagicBG home page and drag in your image.
- Step 2. Let the AI isolate the subject and download the transparent PNG.
- Step 3. In Illustrator, choose File → Place and select your PNG.
The model runs locally in your browser, so the original file never leaves your device, and there's no watermark, signup, or resolution cap. If you specifically need the background gone insideIllustrator — because you're tracing to vector or working with native vector art — keep reading.
Method 1: Clipping mask (best for photos)
A clipping mask hides everything outside a shape you draw, without permanently deleting anything. It's the cleanest non-destructive way to "remove" a background from a placed raster image in Illustrator.
- Place your image (File → Place) and, if it's a linked file, click Embed in the top toolbar.
- Grab the Pen tool (P) and trace a closed path around your subject. Take your time on the curves — this is the slow part.
- Select both the path and the image (Select → All, or shift-click both).
- Choose Object → Clipping Mask → Make, or press Cmd/Ctrl + 7.
Everything outside your path disappears. Because it's a mask, you can double-click into it later to adjust the path if you missed an edge. The catch: for subjects with hair, fur, or soft edges, hand-tracing a path will never look as natural as AI segmentation. For those, the transparent-PNG route above wins every time. For more on why soft edges are so hard, see our guide on fixing jagged edges after background removal.

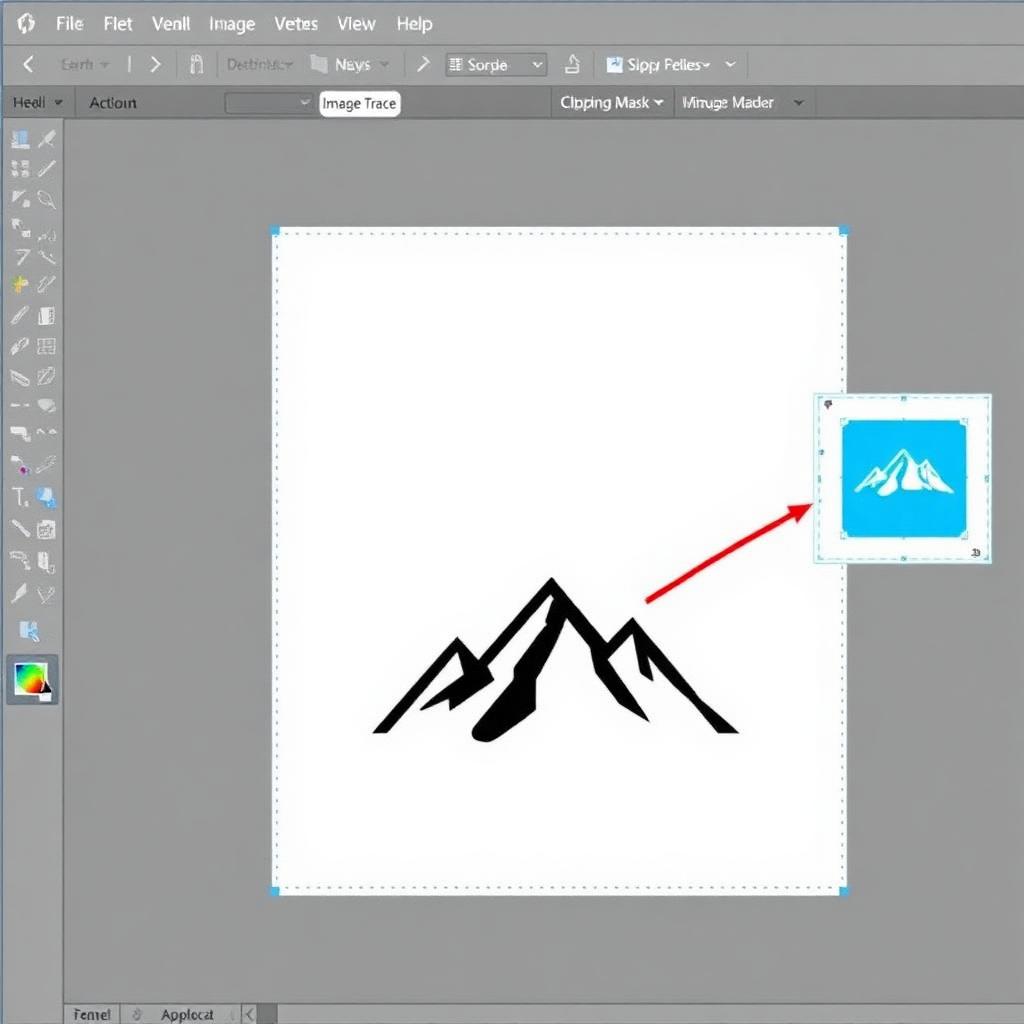
Method 2: Image Trace (best for logos & line art)
If your goal is to turn a raster logo or piece of line art into editable vector shapes and drop the background, Image Trace is the tool. It converts pixels into vector paths and can discard the white or solid background in the process.
- Select your placed image and open Window → Image Trace.
- Pick a preset — Black and White Logo for simple marks, 3 Colors or 6 Colors for more detail.
- Open Advanced and tick Ignore White so the background isn't traced into a shape.
- Click Expand in the top toolbar to convert the trace into real, editable vector paths.
Image Trace shines on high-contrast logos and shrinks gracefully — see Adobe's own Image Trace documentation for every setting. It struggles on photographs, where it produces a messy blob of hundreds of tiny shapes. Use it for marks and illustrations, not portraits.
Method 3: The Pen tool by hand (maximum control)
When precision matters more than speed — a hero illustration, a packaging dieline, anything that will be printed large — tracing the silhouette by hand with the Pen tool gives you total control over every anchor point. The workflow is the same as the clipping-mask method, but you spend real time perfecting the curves with the Anchor Point tool and the direction handles. Budget five to fifteen minutes for a detailed subject. This is craftsmanship, not efficiency — reserve it for the cases that genuinely need it.
Method 4: Opacity mask (for gradients & soft fades)
An opacity mask uses a grayscale shape to control transparency: white reveals, black hides, gray partially fades. It's the right tool when you want a subject to fade into transparency rather than be cut with a hard edge — think a reflection, a vignette, or a soft-edged photo blend. Select your image, open theTransparency panel, click Make Mask, and paint or place a gradient on the mask. It's overkill for a standard "remove the background" job, but invaluable for creative composites.
Exporting with a transparent background
Removing the background inside Illustrator only matters if you export it correctly. Two rules:
- Kill the artboard rectangle. Make sure there's no white background shape sitting behind your art — delete it or the export will bake in white.
- Pick the right format. Use File → Export → Export As → PNG with the background set to Transparent for raster output, or SVG if you want to keep the art fully scalable as vectors.
PNG preserves photographic detail; SVG keeps logos crisp at any size and is tiny on the web. If you're deciding between formats for the web, our PNG vs WebP comparisonbreaks down file size and quality trade-offs. And if you just need a transparent PNG without any of this, our free PNG maker guide shows the one-step route.
Which method should you use?
- A photo (product, person, anything detailed): Remove the background with AI first, place the transparent PNG. Fastest and cleanest.
- A logo or line art you want as vectors: Image Trace with "Ignore White," then Expand.
- A photo you must mask inside Illustrator: Clipping mask with the Pen tool.
- A soft fade or reflection: Opacity mask.
FAQ
Can Illustrator remove a background automatically?
Not from a photo — Illustrator has no one-click photo background remover. Image Trace can drop a solid background from a logo, but for photographs the fastest automatic option is an AI tool like MagicBG, then placing the transparent PNG.
What's the difference between Image Trace and a clipping mask?
Image Trace converts a raster image into editable vector shapes; a clipping mask hides part of an image without changing it. Trace for logos and line art, mask (or transparent PNG) for photos.
How do I keep the background transparent when I export?
Export as PNG with the background set to Transparent, or as SVG for vector art, and make sure no white rectangle sits behind your artwork on the artboard.
Bottom line
Illustrator gives you four solid ways to remove a background — clipping mask, Image Trace, the Pen tool, and opacity masks — but none of them are fast for photographs. In 2026, the smart workflow is to let AI do the cutout in five seconds, then bring the clean transparent PNG into Illustrator for layout, color, and vector work. Start at the MagicBG home page, grab your transparent PNG, and place it.