June 8, 2026 · 13 min read
How to Make the Background Transparent in Photoshop (2026 Step-by-Step Guide)
Learn how to make a background transparent in Photoshop in 2026 — Select Subject, layer masks, refining hair edges, and exporting a transparent PNG, plus a free one-click alternative.
Adobe Photoshop is the industry standard for image editing, and one of the most searched questions among designers, photographers, and online sellers is how to make the background transparent in Photoshop. A transparent background lets you drop a subject onto any color, photo, or layout without an ugly white box surrounding it — essential for logos, product shots, composites, thumbnails, and marketing graphics. Photoshop gives you several ways to do this, from a one-click AI selection to precise manual masking. This 2026 guide walks through every reliable method, shows you how to handle tricky hair edges, and explains how to export a true transparent PNG. We will also cover a completely free alternative for when you don't have Photoshop or simply want a result in seconds.
What a transparent background actually means
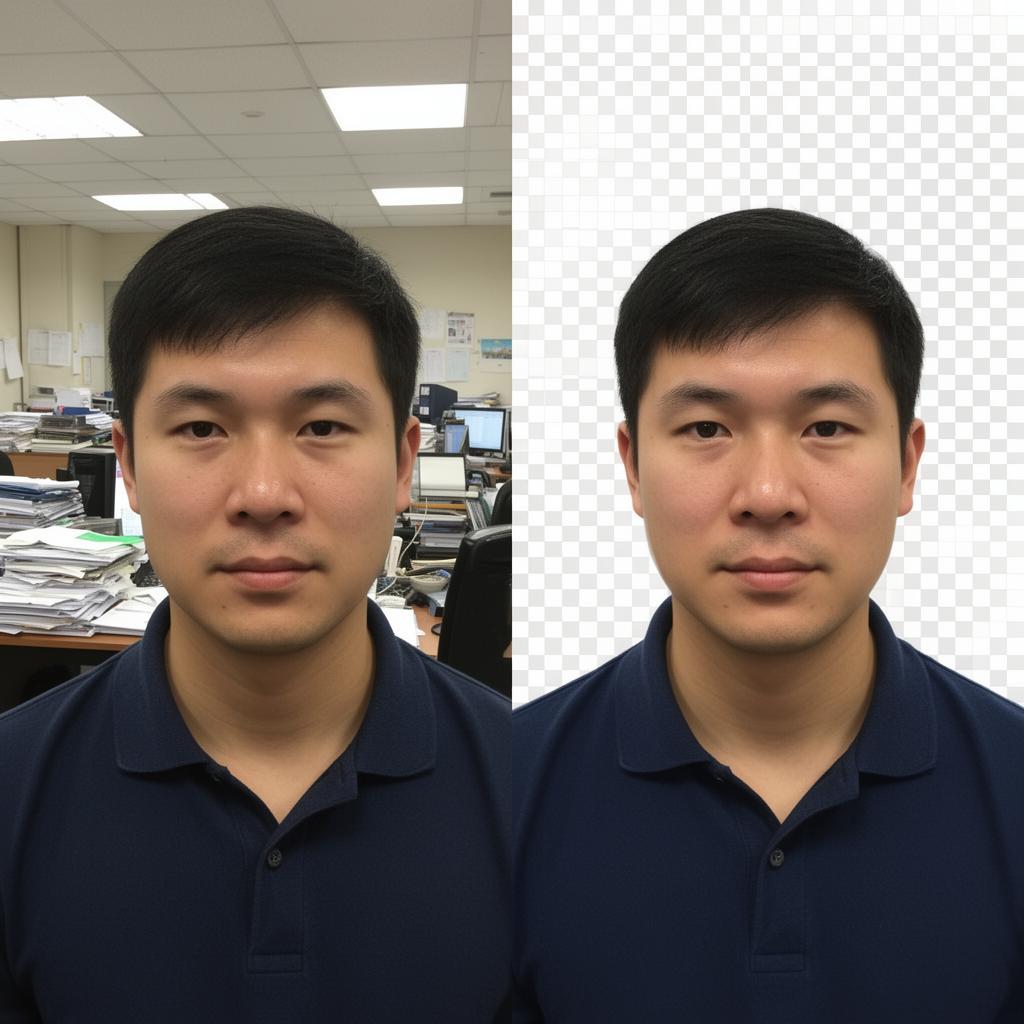
A transparent background is an image where the pixels behind your subject hold no color at all — they are empty rather than white or black. This empty area is stored in an alpha channel, a layer of transparency data that formats like PNG and WebP support but JPG does not. When you place a transparent image into a design, anything underneath shows through the empty pixels, so your subject appears to float over any background.
In Photoshop, transparency is represented by the gray-and-white checkerboard pattern you see when a layer has no background. The goal of every method below is to remove the background pixels and replace them with that checkerboard — then preserve it when you export. Get this concept right and the rest of the workflow becomes intuitive.
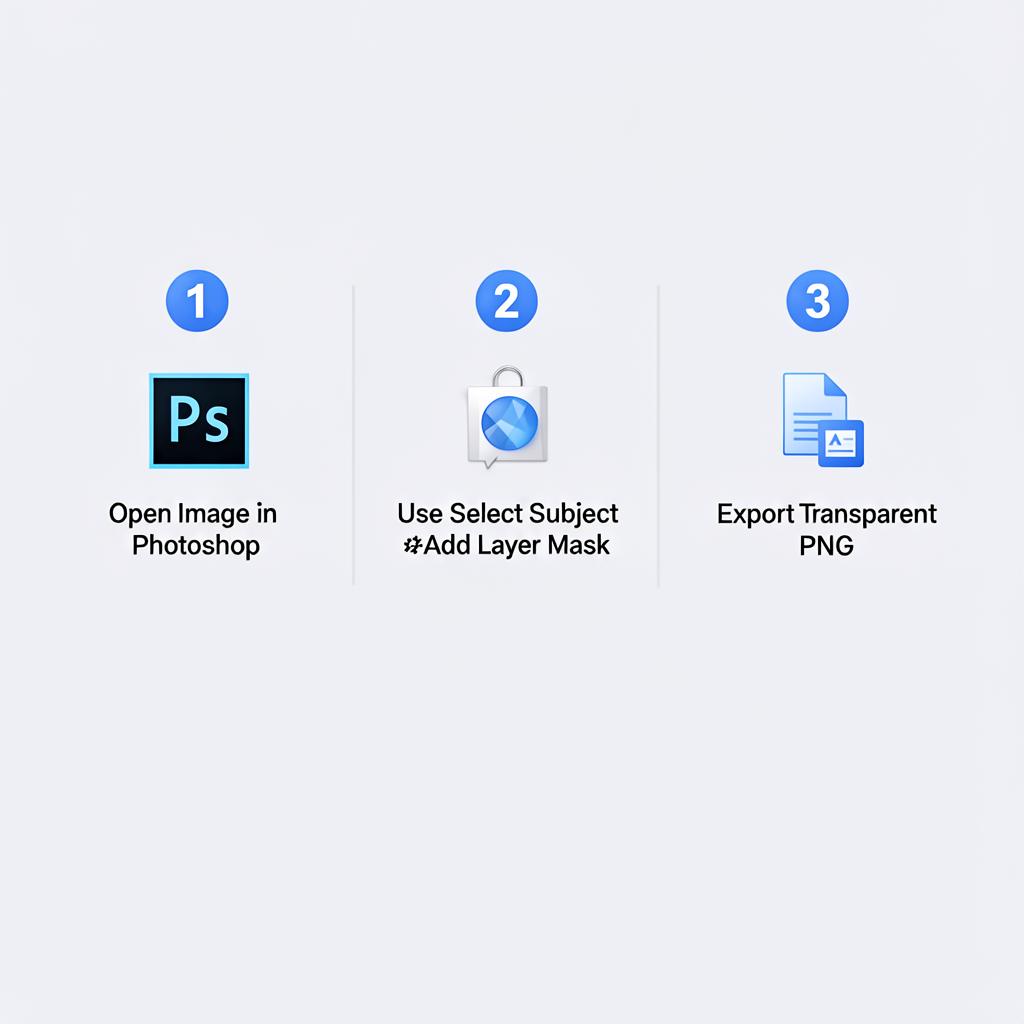
Method 1: Select Subject and a layer mask (fastest)
Since Photoshop 2020, Adobe's AI-powered Select Subject command can isolate a person, animal, or product automatically. Combined with a layer mask, it is the fastest non-destructive way to make a background transparent.
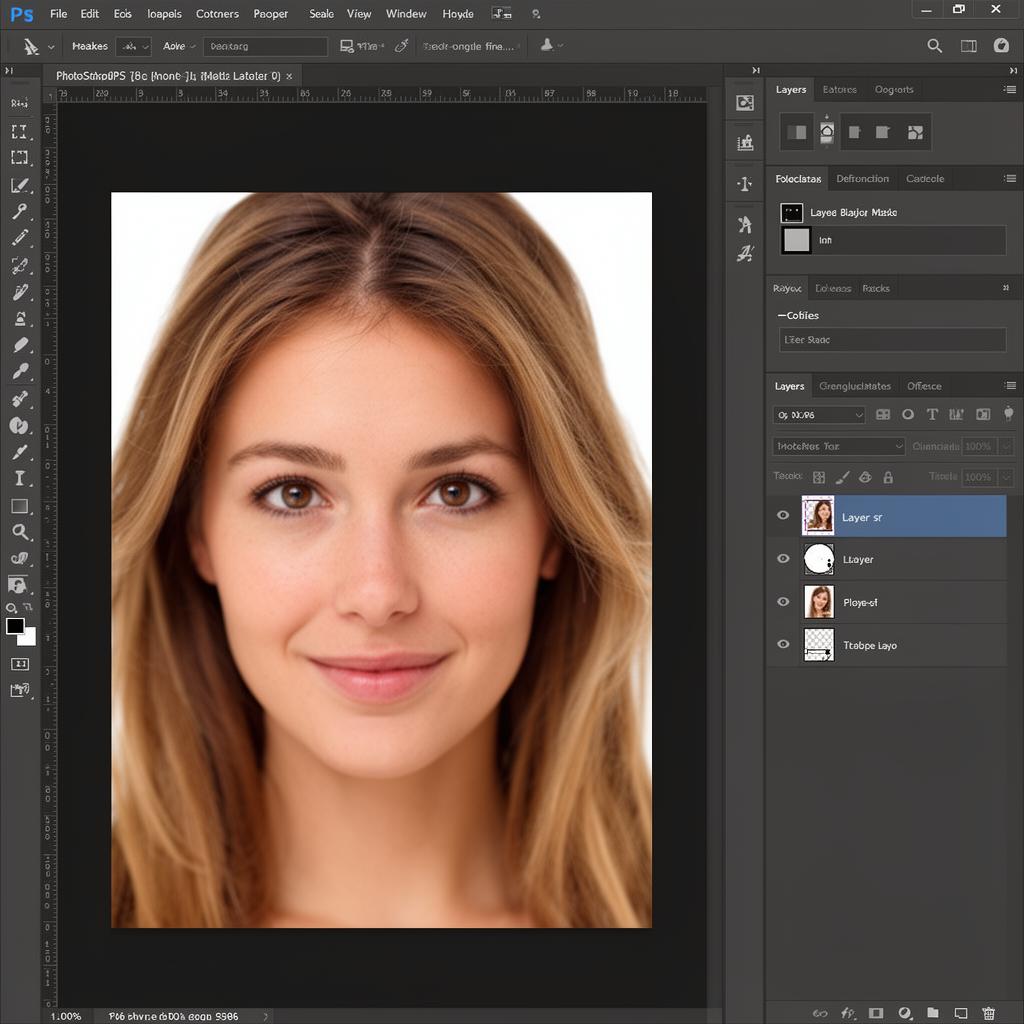
Step 1: Open your image and unlock the layer
Open your photo in Photoshop. In the Layers panel, the image usually appears as a locked "Background" layer with a small padlock icon. Click the padlock once to convert it into a normal, editable layer (it becomes "Layer 0"). You must do this before transparency is possible — a locked background layer cannot hold transparent pixels.
Step 2: Run Select Subject
Go to Select > Subject from the top menu, or click the Object Selection tool and use the Select Subject button in the options bar. Photoshop analyzes the image and draws a selection (marching ants) around the main subject in a couple of seconds. For portraits and clear product shots, the result is often surprisingly accurate right away.
Step 3: Add a layer mask
With the selection active, click the Add layer mask button at the bottom of the Layers panel (the rectangle-with-a-circle icon). Photoshop instantly hides everything outside your selection, revealing the transparent checkerboard behind the subject. Because this is a mask rather than a permanent erase, you can refine or undo it at any time without damaging the original pixels.
Method 2: Refine the mask for hair and fine edges
Select Subject gets you most of the way, but hair, fur, and semi-transparent edges almost always need refinement. This is where Photoshop's Select and Mask workspace shines.
- With your masked layer selected, click the layer mask thumbnail, then choose Select > Select and Mask.
- Pick the Refine Edge Brush from the left toolbar and paint over wispy hair or fur. Photoshop recalculates the edge, capturing strands the initial selection missed.
- Adjust the Smooth, Feather, and Contrast sliders to soften or sharpen the outline.
- Enable Decontaminate Colors to remove the faint halo of the old background that often clings to edges.
- Set the Output To Layer Mask and click OK.
This step is the difference between an amateur cutout with a hard, jagged outline and a professional one with natural edges. If you still see rough edges after exporting, our guide on fixing jagged edges after background removal covers extra fixes.
Method 3: Manual selection tools for full control
When AI selection struggles — busy backgrounds, low contrast, or unusual shapes — Photoshop's manual tools give you complete control.
The Pen tool
The Pen tool creates precise vector paths around hard-edged subjects like furniture, electronics, or bottles. Click to place anchor points, drag to curve them, then close the path, convert it to a selection (Ctrl/Cmd + Enter), and add a layer mask. It takes practice but produces the cleanest edges for geometric objects.
Quick Selection and Magic Wand
The Quick Selection tool lets you paint over the subject while Photoshop snaps to edges automatically. The Magic Wand selects areas of similar color in one click — ideal when your subject sits on a plain, uniform background. After selecting the background, invert the selection (Select > Inverse) so the subject is selected, then add a mask.
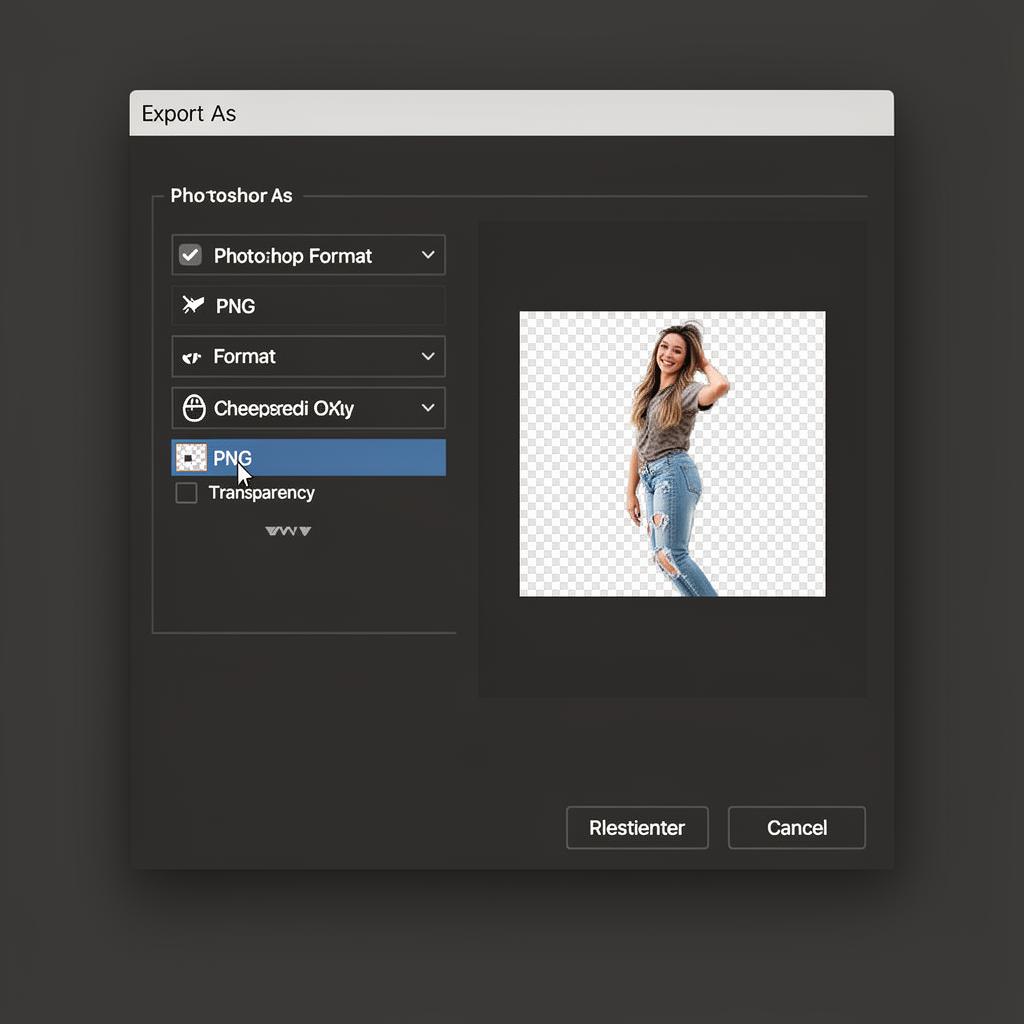
How to export a transparent PNG from Photoshop
Removing the background inside Photoshop is only half the job — you must export in a format that keeps the transparency. JPG will flatten your cutout onto a white background, so always choose PNG (or WebP).
- Go to File > Export > Export As.
- Set the format to PNG.
- Make sure the Transparency checkbox is enabled.
- Confirm the preview shows the checkerboard behind your subject, then click Export and choose a location.
For quick saves you can also use File > Save a Copy and pick PNG. Avoid "Save As JPEG" for any image that needs transparency. If you are deciding between formats, our comparison of PNG vs WebP for transparent images explains which to use and when.
The free alternative when you don't have Photoshop
Photoshop is powerful, but it costs a monthly subscription, has a steep learning curve, and removing a single background can take ten minutes once you factor in refining edges. If you just need a clean cutout fast — or you don't own Photoshop at all — a free browser-based remover is far quicker.
With MagicBG, you can remove a background and download a transparent PNG in seconds — completely free, with no watermark, no signup, and no daily limit. The AI runs locally in your browser using WebGPU, so your photo never uploads to a server and your privacy stays intact. The workflow is far simpler than Photoshop:
- Upload your image. Drag any JPG, PNG, or WebP file into the browser window.
- Let the AI process. The segmentation model isolates the subject and removes the background in two to four seconds — hair edges included.
- Download the transparent PNG. The output keeps the full resolution of your original; only the background is removed.
Many designers use both tools together: get the instant cutout from MagicBG, then import the transparent PNG into Photoshop for compositing, color work, or layout. If you want a deeper look at the technology, read our explainer on how AI background removal works.
Tips for the cleanest cutout
No matter which method you use, the quality of your result depends heavily on the photo you start with. These habits make every tool's job dramatically easier.
- Start with high resolution. A small, low-quality image produces blurry, unreliable edges. Always work from the largest version you have.
- Shoot with contrast. A subject that stands out clearly from its background gives the cleanest mask. Avoid same-color situations like a white shirt on a white wall.
- Use even lighting. Harsh shadows that blend into the subject confuse edge detection. Soft, diffused light produces crisper outlines.
- Avoid motion blur. A sharp, in-focus subject always cuts out better than a blurry one.
- Mind the hair. Fine strands are the hardest part of any cutout. Hair against a plain, contrasting background gives the best results; busy backgrounds create stray pixels.
Common Photoshop transparency mistakes
Even with the right tools, a few avoidable errors trip up new users. Here is what to watch for.
Saving as JPG instead of PNG
JPG cannot store transparency — it has no alpha channel. Export as JPG and the background becomes solid white. Always choose PNG or WebP for any transparent image.
Forgetting to unlock the Background layer
A locked "Background" layer cannot contain transparent pixels — erasing on it fills the area with your background color instead. Always click the padlock to convert it to a normal layer first.
Using the Eraser instead of a mask
The Eraser tool permanently deletes pixels, so a mistake forces you to start over. A layer mask is non-destructive — paint with black to hide and white to reveal, and you can always recover the original.
Ignoring edge fringing
A faint halo of the old background color often clings to the subject's outline, most visible against a contrasting color. Use Decontaminate Colors in Select and Mask, or re-process the image with a tool that includes edge decontamination.
What to do with your transparent image
Once you have a clean transparent PNG, the possibilities open up. Here are the most popular uses among designers in 2026.
Logos and brand assets
A transparent logo works on a dark website header, a light business card, and a colored t-shirt without any white box ruining the look. See our guide on removing the background from a logo.
Product photos for online stores
Marketplaces like Amazon and Etsy reward clean, consistent product images. A transparent cutout lets you place every product on a uniform white or branded background. See our ecommerce product photo guide for the full workflow.
Thumbnails and social graphics
The highest-performing thumbnails feature a cut-out subject layered over a bold background. Read our YouTube thumbnail guide for design tips that boost click-through.
How to make the background transparent in Photoshop FAQ
What is the fastest way to remove a background in Photoshop?
Use Select > Subject to auto-select your subject, then click Add layer mask to hide the background. For tricky hair, refine the result in the Select and Mask workspace before exporting as a transparent PNG.
How do I export a transparent PNG in Photoshop?
Go to File > Export > Export As, set the format to PNG, and make sure the Transparency checkbox is enabled. Confirm the preview shows the checkerboard pattern behind your subject, then export.
Why is my Photoshop background white instead of transparent?
This usually means you saved as JPG (which cannot store transparency) or you didn't unlock the Background layer before editing. Unlock the layer, use a mask, and export as PNG with Transparency enabled.
Can I make a background transparent in Photoshop without paying?
Photoshop itself requires a Creative Cloud subscription. For a free option, use MagicBG to remove the background and export a transparent PNG in your browser in seconds, then import it into Photoshop if you need further editing.
How do I keep hair edges clean when removing a background?
Use the Refine Edge Brush inside Select and Mask, paint over the hair, and enable Decontaminate Colors to remove the background halo. Starting with a high-contrast, sharp photo makes a big difference.
Bottom line
Making the background transparent in Photoshop comes down to four steps: unlock the layer, select the subject (Select Subject is fastest), add a layer mask and refine the edges, then export as a PNG with Transparency enabled. For hard edges the Pen tool gives precision; for hair the Select and Mask workspace is essential. If you don't have Photoshop or want a result in seconds, a free browser tool like MagicBG removes backgrounds instantly with no watermark and no signup — and the transparent PNG drops straight into Photoshop for any further work.
Try MagicBG now — the free, watermark-free background remover that runs entirely in your browser.