
June 2, 2026 · 12 min read · By MagicBG Team
Last updated: September 24, 2026
How to Remove a Signature Background: Transparent PNG Guide
Turn a scanned signature into a clean transparent PNG. Free AI remover — no white box, no watermark, no signup. Ideal for PDFs and contracts.
A signature with a transparent background looks professional everywhere on a contract, a PDF, a Word document, or the bottom of an email. But most people start with a photo or a scanned signature that carries an ugly grey or off-white box around the ink. The fix is to remove the background from your signature and export a clean signature PNG. In 2026 you can do this in about five seconds with a free AI background remover no Photoshop, no app, no signup, and no watermark. Want to skip the reading? Open MagicBG and make your transparent signature now.
This guide covers everything: why a transparent sign PNG matters, the exact step-by-step workflow for a handwritten signature or a scanned signature, how to get crisp ink edges, how to insert the finished png signature into a PDF, Word, Google Docs, and email, plus the most common mistakes that leave a white box behind. By the end you'll have a reusable, paste-anywhere signature you can drop onto any document.

Why a transparent signature PNG matters
When you photograph or scan your signature, the paper becomes part of the image. Paste that raw file onto a colored letterhead or a PDF and you get a visible rectangle that screams "copy-paste." A transparent signature background remover deletes the paper and keeps only the ink, so the signature blends into any document like it was signed there directly. Three reasons it's worth doing properly:
- It looks professional. No white or grey box means your signature sits naturally on contracts, invoices, and certificates.
- It's reusable. Make the transparent PNG once and paste it onto unlimited documents PDFs, Word files, slide decks, and email footers.
- It works on any background. A transparent sign PNG looks right on white paper, colored letterhead, or a dark presentation slide.
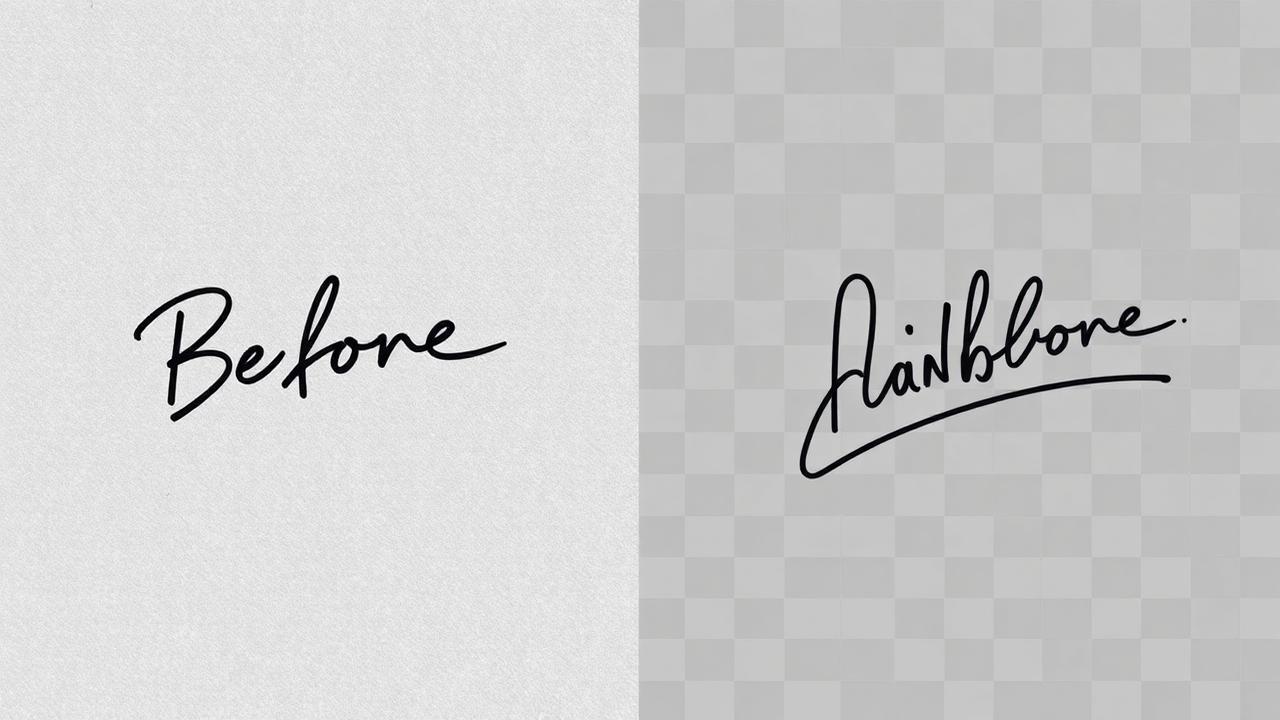
The fast answer: make a transparent signature in 3 steps
Here's the entire workflow. It takes less time than opening Photoshop:
- Upload a photo or scan of your signature to a free background remover.
- Wait ~5 seconds while the AI isolates the ink and deletes the paper background.
- Download the transparent signature PNG and paste it into any PDF, Word doc, or email.
No subscription, no "remove bg" credits, and no watermark stamped across your name. The cutout is yours to reuse forever.
Step-by-step: remove the background from a signature
1. Capture a clean source signature
AI quality is mostly about the input. Sign your name in dark ink (black or blue) on plain white paper, then photograph or scan it in bright, even light. High contrast between the ink and the paper gives the AI a crisp edge to follow, which means a cleaner handwritten signature cutout with no broken strokes.
2. Remove the background
Open the free AI background remover and drag your signature image into the upload zone. The model detects the ink strokes and removes the paper automatically. The technology behind this is called image segmentation you can read a plain-English overview on Wikipedia, or compare the manual approach in Adobe's Select Subject documentation. For a deeper explainer, see how AI background removal works.
3. Download as a PNG (not a JPG)
Always export your signature as a PNG. PNG supports transparency; a JPG does not, so saving as JPG bakes a solid white box right back behind your ink. If you need to know which format to use and when, our guide on PNG vs WebP for transparent images breaks it down.

Scanned signature vs handwritten signature
The workflow is the same whether you start from a flatbed scanned signature or a handwritten signature snapped with your phone, but each has a quirk worth knowing:
- Scanned signature: scanners often add a faint grey tint to white paper. The AI removes it cleanly, but scanning in "black and white" or "document" mode gives the highest contrast.
- Handwritten signature (phone photo): watch for shadows. Lay the paper flat, avoid casting your own shadow over it, and shoot straight down so the strokes stay sharp.
How to insert a transparent signature into documents
Once you have the transparent png signature, here is how to place it in the three most common document types. Menu names can differ slightly between versions.
Into a PDF (using a PDF editor)
- Open the PDF in a PDF editor that can add images (for example Adobe Acrobat, or Preview on a Mac).
- In Acrobat, choose Edit PDF → Add Image; in Preview, open Tools → Annotate → Signature or paste the PNG with Edit → Paste.
- Select your transparent signature PNG, drag it onto the signature line and resize it from a corner so it keeps its proportions.
- Save the PDF under a new name so you keep the unsigned original.
Into a Microsoft Word document
- Place the cursor near the signature line and choose Insert → Pictures → This Device.
- Select the PNG. With the picture selected, open Layout Options (or Wrap Text) and choose In Front of Text.
- Drag the signature onto the line and resize it from a corner handle.
- Optional: save it for reuse with Insert → Quick Parts → Save Selection to Quick Part Gallery.
Into a Google Doc
- Choose Insert → Image → Upload from computer and select the PNG. Uploading keeps the transparency more reliably than pasting.
- Click the image and pick In front of text in the toolbar that appears under it.
- Drag it onto the signature line and resize from a corner.
Important: a picture of a handwritten signature is not a legally certified electronic signature. For contracts that require e-signature compliance (for example under eIDAS in the EU or the ESIGN Act in the US), use a dedicated e-signature service instead.

Tips for the cleanest signature cutout
- Use a thick pen. A fine ballpoint can produce thin, broken strokes after cutout. A gel pen or marker gives bolder, more reliable ink.
- Maximize contrast. Dark ink on white paper is ideal. Avoid pencil, light grey ink, or colored paper.
- Shoot big. A larger, higher-resolution capture scales down beautifully; a tiny crop upscaled looks fuzzy.
- Crop close before upload. Trim away most of the surrounding paper so the signature fills the frame.
- Check the edges. If you see a faint halo, follow our jagged edges fix for a perfect outline.
How MagicBG handles your images is explained in our AI policy.
Transparent signature FAQ
How do I remove the background from a signature?
Upload a photo or scan of your signature to a free background remover, let the AI delete the paper, and download the transparent PNG. Then paste it onto any document.
How do I make a transparent signature PNG?
Remove the background from your signature image, then export it as a PNG (not a JPG). PNG keeps the transparency so there's no white box behind the ink.
How do I remove the white background from a scanned signature?
Scan the signature, upload it to the AI remover, and the white or grey paper is deleted automatically. For the cleanest result, scan in high-contrast "document" or black-and-white mode.
Can I add a transparent signature to a PDF?
Yes. Use the "Add image" or "Stamp" tool in any PDF editor and place the transparent PNG over the signature line only the ink shows, so it looks naturally signed.
Is it free and safe?
Yes. With MagicBG your signature is processed locally in your browser and never uploaded, so it stays private and there's no watermark or signup.
Bottom line
A clean, professional signature went from a Photoshop chore to a five-second browser task. Capture your signature in dark ink, remove the background, and export a transparent PNG you can paste onto every contract, PDF, and email free, private, and watermark-free. Open MagicBG and make your transparent signature now.
Where this fits in the workflow
Selling this photo on Amazon, Etsy, eBay, Walmart or another marketplace? MagicBG's Complete Listing Generator turns a single product photo into a full marketplace-ready listing — optimized images, title, bullets, description and keywords.